Monday, July 20, 2009

Teriyaki Glazed Chicken with Rice and Sauted Vegetables

I came up with this recipe myself last week inspired by the rice bowls from Rumbi Grill. It was so easy!! We will definitely make this one again.

2 lbs of boneless, skinless chicken
salt
pepper
stir fry your favorite veggies in a little oil (julienne carrots, zucchini, celery, onions, broccoli, cabbage, bean sprouts, etc.)
prepared rice

Teriyaki Glaze:

1/4 c soy sauce
1 c water
1/2 tsp powdered ginger
1/4 tsp garlic powder
5 TBS brown sugar
2 TBS honey
2 TBS cornstarch
1/2 c water
hot chili sauce or red pepper flakes, optional

Combine the soy sauce, 1 c water, ginger, garlic powder, brown sugar, and honey in a small sauce pan. Heat to a simmer. Combine the cornstarch and 1/2 c water in a small bowl and add to sauce pan when heated. Stir and cook until it has reached a desired thickness. Add hot chili sauce, if desired. Pour about 1/3 to 1/2 of the sauce into a bowl to be brushed over the chicken. The rest will be used to add to the final dish.

Grill 2 lbs of chicken strips seasoned with salt and pepper. About a minute before they are fully cooked, brush some of the glaze on one side. Remove chicken and slice as desired.

Pile rice on your plate, or bowl and add lots of veggies and chicken. Drizzle with remaining sauce as desired.

Peaches, Plums and Nectarines

I learned about this trick years ago, and it really works.

Growing up, my mom never liked buying peaches from the store that weren't locally grown because they never were ripe and flavorless. I've found that if you have a little patience you can get great summer fruit from the store and not have to wait for the local produce to come on.

When peaches, nectarines, and plums come on sale this time of the year I love to stock up. Don't be afraid to buy ones that are hard. I do try to get ones that look ripe, not green, though. Take them home and put them all in a brown paper bag. Fold it up and leave it on your counter for 2 to 3 days. Check on them daily to see if they are softening. Once they are starting to give, I put them all in the crisper drawer of my fridge. They will stay fresh for many days. They might not always be as juicy as local produce, but they are still a special treat.

Just yesterday we enjoyed some peaches and nectarines with my stuffed crepe recipe with fruit we ripened this way. They seemed especially good. Hurray for fresh summer fruits!!

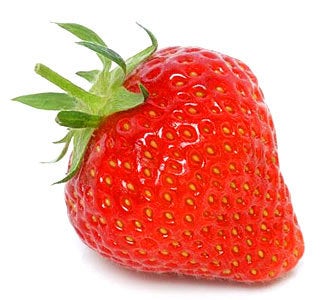
Keeping Strawberries Fresh Longer

I recently found the what I think is the best way to keep strawberries you buy at the grocery store fresh for a long time. I've had them stay almost perfectly fresh for up to a week. Simply leave them in the plastic container they came in and place container inside a plastic grocery bag. Wrap the bag around it and keep in the fridge on a shelf. I've been amazed at how long they stay as fresh as the day you brought them home. In the past I've found that simply putting them in the fridge they start to get soft the next day or so. Try it. It really works.

Sunday, June 21, 2009

Homestyle Barbecue Chicken Pizza


This is definitely a favorite in our home.

2 TBS olive oil
2 chicken boneless skinless chicken breasts, cut into strips
1 t chili powder
1 t garlic powder
1 medium onion, diced
1 red or green pepper, diced
1 c your favorite barbeque sauce (I like KC Masterpiece or Bullseye best, but any will do)
1-2 cups sharp cheddar cheese, shredded
Dough for one pizza. I like to use my Homestyle Pizza Dough recipe.

Season chicken with salt and pepper and cook over medium heat in a skillet with olive oil. (You can also use grilled chicken and omit this step.)

When chicken is cooked, stir in garlic and chili powders. Add onions and bell pepper and cook for a minute or two so the veggies are a little tender.

Par-bake the rolled out pizza dough for about 6 minutes at 425 degrees before adding the toppings. Arrange the chicken topping evenly over the partially baked crust. Drizzle the barbecue sauce over the chicken (it won't like a lot of sauce, but will spread when baking), then sprinkle with cheese.

Return the pizza to the oven for 14-18 minutes, or until the crust is golden brown.

Homestyle Pizza Dough

This is one of my favorite pizza doughs. It is really good made into Barbecue Chicken Pizza.

1 c warm water
1 TBS yeast
3 TBS olive oil
2-3 c bread flour
1 t salt

Beat half of the flour, yeast oil, and water for 3 minutes. Add salt and enough flour to make a soft dough. Beat for an additional minute, or until it looks smooth. Let rise for an hour in an oiled bowl for an hour covered with plastic wrap.

You can also add herbs and cheeses to the dough if you'd like (during the last mixing phase).

Roll out on a stone, or pizza pan to desired thickness. I like to first sprinkle a little corn meal on the stone or pan. Load on desired toppings and bake at 425 degrees for 15-20 minutes (or until the bottom is lightly golden and crisp.

Tuesday, June 2, 2009

Mom's Chocolate Chip Cookies


I've tried so many chocolate chip cookie recipes, but this is one of my absolute favorites. It has an excellent texture and they never turn out flat. I find myself craving this recipe often. My mom acquired it years ago from the "Gabby Gourmet" who did TV spots on the local news channel years ago. It is different than other recipes in that it beats some of the ingredients for a long period of time and also adds cornstarch to the mixture. My mom likes to take them out while they are still a bit doughy, but I like them more well done and golden.

1 c butter
3/4 c sugar
3/4 c brown sugar
2 eggs
3 c flour, stirred and measured
1/4 corn starch
2 tsp baking soda
1 tsp salt
1 TBS vanilla
2 c semi-sweet chocolate chips
coconut (optional)--I like 1 cup

Cream butter and sugars for 4-5 min. Add eggs, beat for another 4-5 min. Add dry ingredients, mix well. Add vanilla. Add chocolate chips. Bake for 8-10 min in 350 degree oven. (They may look a bit under baked if you use this time frame, but they will set up nicely-- I personally like to bake mine for 11 or 12 min. or until they are starting to turn a little golden)

Tuesday, May 12, 2009

Harvest Stuffed Squash


My Mom requested this recipe ages ago and I delayed because I wanted to make it again so I could take a picture to post (this is a picture of the picture in my book). Sorry about the wait, Mom.

I got this recipe from attending the Taste of Home Cooking School several years ago. I make it a lot in the fall when squash is the best, but it can be made anytime. It is pretty healthy and is one of my favorites. One half a squash equates to one serving.

2 acorn squash
3/4 lb ground beef
1 medium onion, chopped
1 cup tart apple, diced
1 clove garlic, minced
2 T flour
3 T soy sauce
3 T beef broth or apple juice
4 tsp shredded Parmesan cheese

Cut the squash in half lengthwise (to help cut them, stab with a knife and microwave for 3 minutes). Remove the seeds and place face down in a baking pan. Fill with hot water 1/2 in deep. Bake uncovered for 30 minutes at 400 degrees.

While squash is baking, cook beef with onion, apple and garlic in skillet until meat is no longer pink and the onion is tender. Sprinkle the flour evenly over the meat mixture. Stir and add soy sauce and broth or juice. Cook until slightly thickened. Remove from heat. Turn squash halves over and fill each half with an equal amount of meat. Return to oven and bake for 15 minutes. Sprinkle with Parmesan and bake for 5 more minutes.